

ownCloud gives you universal access to your files through a web interface or WebDAV. It also provides a platform to easily view & sync your contacts, calendars, and bookmarks across all your devices and enables basic editing right on the web. Installation is quick, has minimal server requirements, and doesn’t require special permissions. ownCloud is also extendable via a simple but powerful API for applications and plugins. Here’s a step-by-step tutorial on how to setup ownCloud on a Virtual Private Server (VPS).
Prerequisites:
– You’ve acquired a VPS solution.
– You’ve installed an SSH client (PuTTy is our terminal of choice).
– You’ve installed a LAMP stack (i.e. you’ve installed Apache, PHP, and MariaDB).
Step 1: Log on to VPS.
First, you need to log on to your VPS.
Step 2: Install PHP components.
Install PHP components that can be used by ownCloud by using the following command:
yum php-mysql php-mcrypt php-curl php-gdStep 3: Download and Install Owncloud.
Run the following shell commands as root to trust the repository:
rpm --import https://download.owncloud.org/download/repositories/stable/CentOS_7/repodata/repomd.xml.keyRun the following shell commands as root to add the repository and install from there:
wget http://download.owncloud.org/download/repositories/stable/CentOS_7/ce:stable.repo -O /etc/yum.repos.d/ce:stable.repoyum clean expire-cacheyum install owncloudStep 4: Create MySQL Database and User.
Use the following commands to create a user and MySQL database for ownCloud in MariaDB:
# mysql -u root -pEnter password:mysql> CREATE DATABASE owncloud;
mysql> GRANT ALL ON owncloud.* to 'owncloud'@'localhost' IDENTIFIED BY '_password_';mysql> FLUSH PRIVILEGES;mysql> quitStep 5: Access ownCloud and Create Admin Account.
Now, you access your ownCloud directory by visiting http://your_VPS _IPaddress/owncloud/
You should see the following screen:
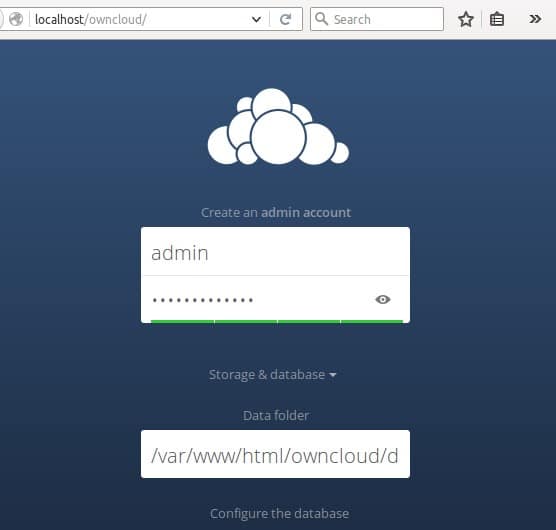
Here, enter new admin credentials to create an admin account. Input the database credentials, then click “Finish Setup.”
After completing the admin setup, you should see an admin dashboard that looks like this:
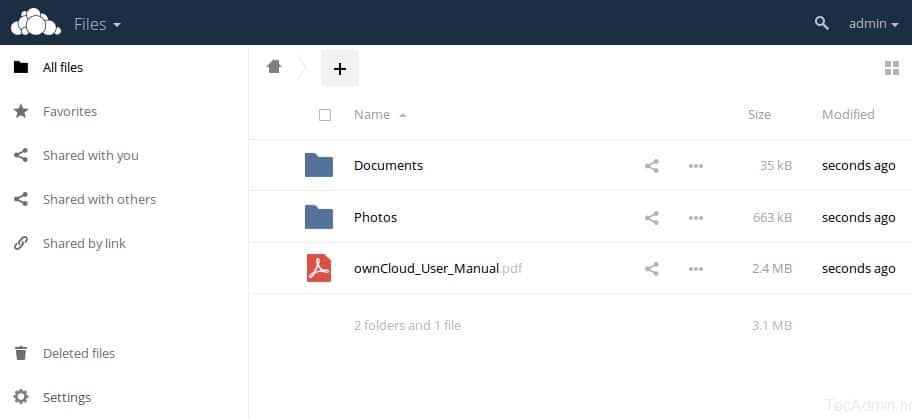
From here, you can create users and groups, assign permissions, etc.
That’s it! You now know how to set up ownCloud on your VPS!